
if you need to upgrade images to SD card or else want to create a new SD card with upgraded version for USRP E310, then follow the steps mentioned below:
Step 1:
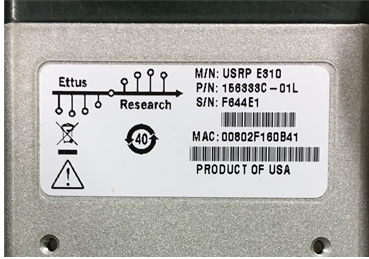
Product Number or P/N follows a series 156333X – 01L.
Where X is the label given to the device by the manufacture.
- If the USRP E310 boards having X label falls in A, B, C, D, then install the SG1 Image from the latest release. For example consider the image above, it shows that the USRP E310 is having a Product number as 156333C, hence the SG1 has to be installed from the latest release (currently it is release 4).
- If the USRP E310 Board having X labeled as any alphabet from E to Z, then install the SG3 Image from the latest release 4.
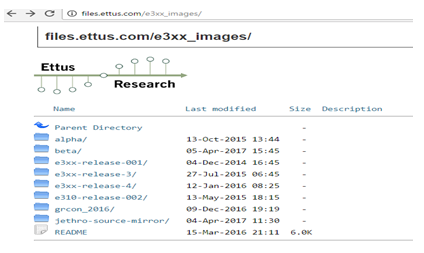
Step 1: click on the link above and select the latest release (currently it is release 4).
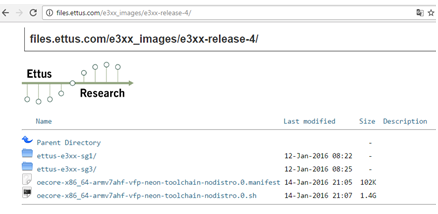
Step 2: There are two Images SG1 and SG3. Depending upon the product number select the particular images.
Step 2:
Download the image from the link. It will take some 10 minutes to install. After Downloading, extract the images from the zip files and place it to the path where you want to save. Take a new SD card or old SD card for upgrading it and further connect it to the system using card reader.
Step 3:
Open a terminal and upgrade SD card by copying the images using dd tool commands as shown below:
sudo dd if=.direct of=/dev/ bs=1M

Using dd tools to upgrade the images on New SD card.
Where < Yourimage> is the image name which you have downloaded and is save with (. direct) extension.
< Yoursdcard> is basically yoursdcard with your block device e.g. /dev/mmcblk0 or /dev/sdb.
In order to check whether SD card is either sdb or mmcblk0 , try testing the command mention below before inserting and after inserting the SD card.
lsblk
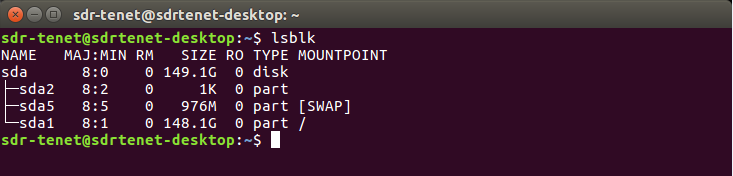
Before inserting the SD card to the host system
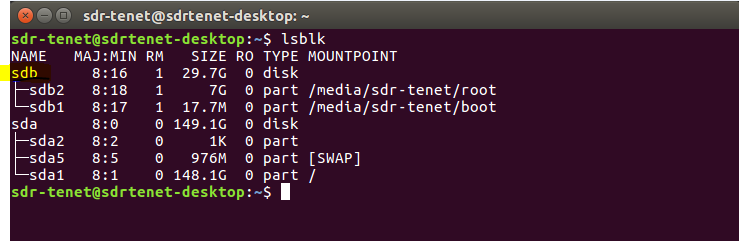
After inserting the SD card to the host system
Based on the comparisons of the figures mentioned above, it can be illustrated that on inserting the SD card , the sdb is displayed on the terminal which is mounted on the system, having two partition i,e root and boot. Hence the SD card we were using was named as /dev/sdb in our system.
It will take some time to copy the images to SD card. Once the image is successfully copied , you can insert it in USRP E310 . Further interface the device with the host system using the serial connection or network connection. Refer the link for complete detail. Once the device is properly interfaced, then type the command mentioned below in order to verify the upgraded version.
uhd_find_devices
The upgraded Image is having a UHD Version of 003_009_002.
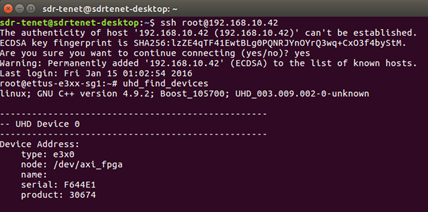
Verifying the up-gradation of UHD version
Now we are ready to implement multiple applications using USRP E310 with the upgraded version of image.